Easy Converse Sole Cleaning: Magical White Sole Ideas
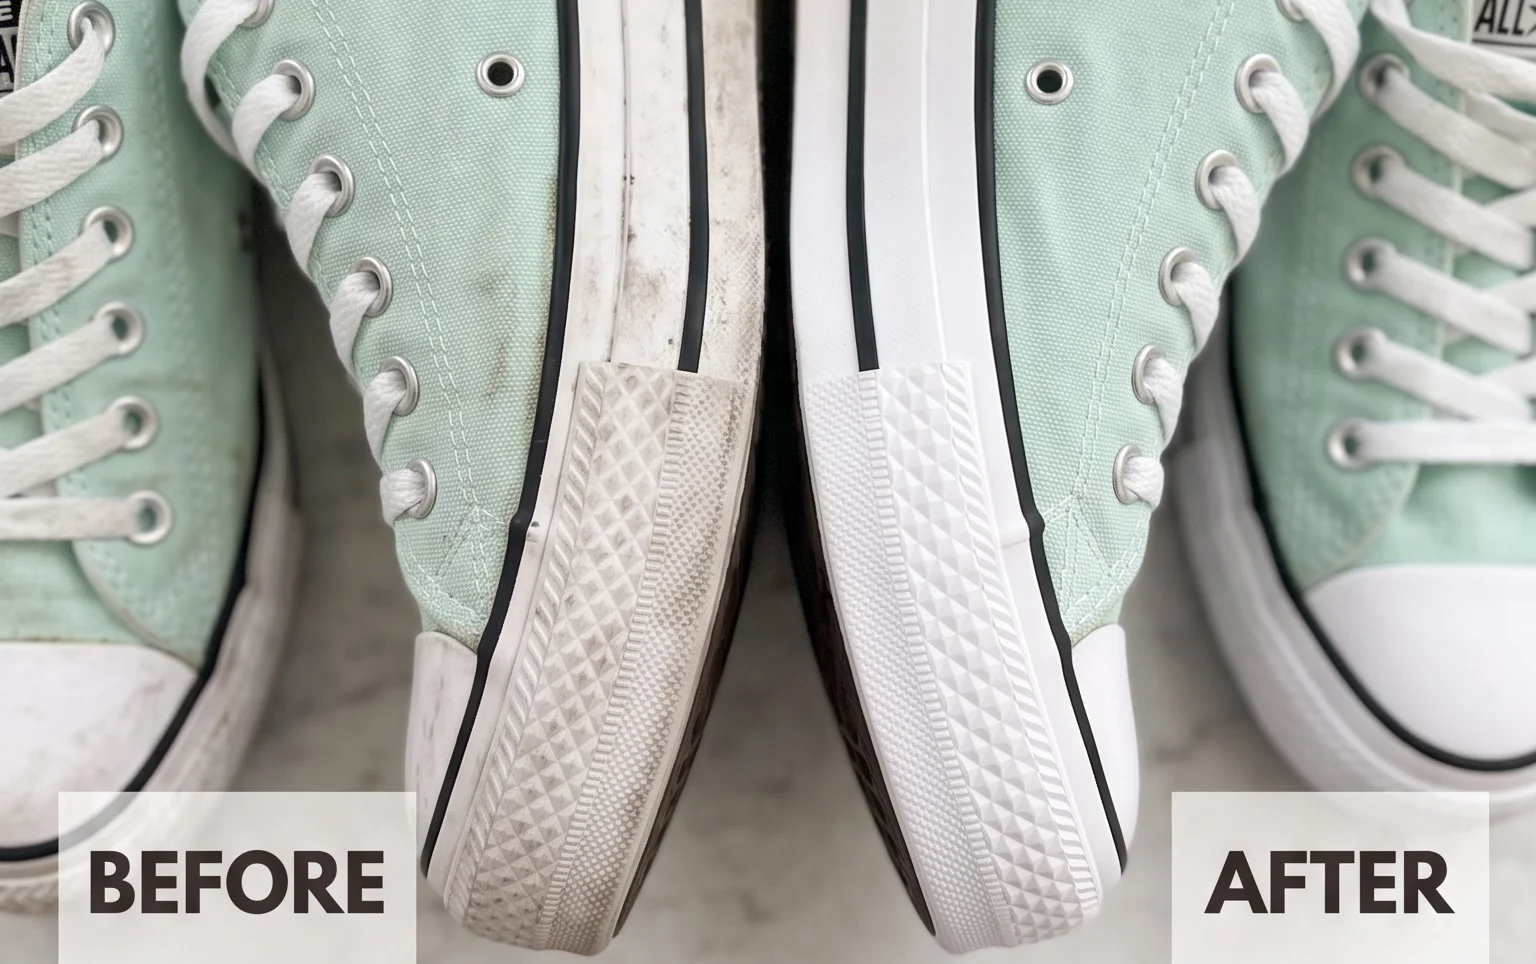
How to clean Converse like magic is about to become your new favorite trick! We’ve all been there, right? You pull your favorite white Converse out of the closet, ready for a stylish outing, only to be met with scuffs, dirt, and those inevitable yellowed rubber soles. They look a little sad, don’t they? Well, imagine your beloved sneakers looking as fresh and bright as the day you bought them, with hardly any effort! We’re talking dazzling white rubber that makes your whole shoe pop. And the best part? This magic trick costs next to nothing – think pennies! – and takes mere minutes. In this article, I’ll show you the simple, everyday solutions to banish grime and restore that pristine look, so you can step out with confidence every single time.
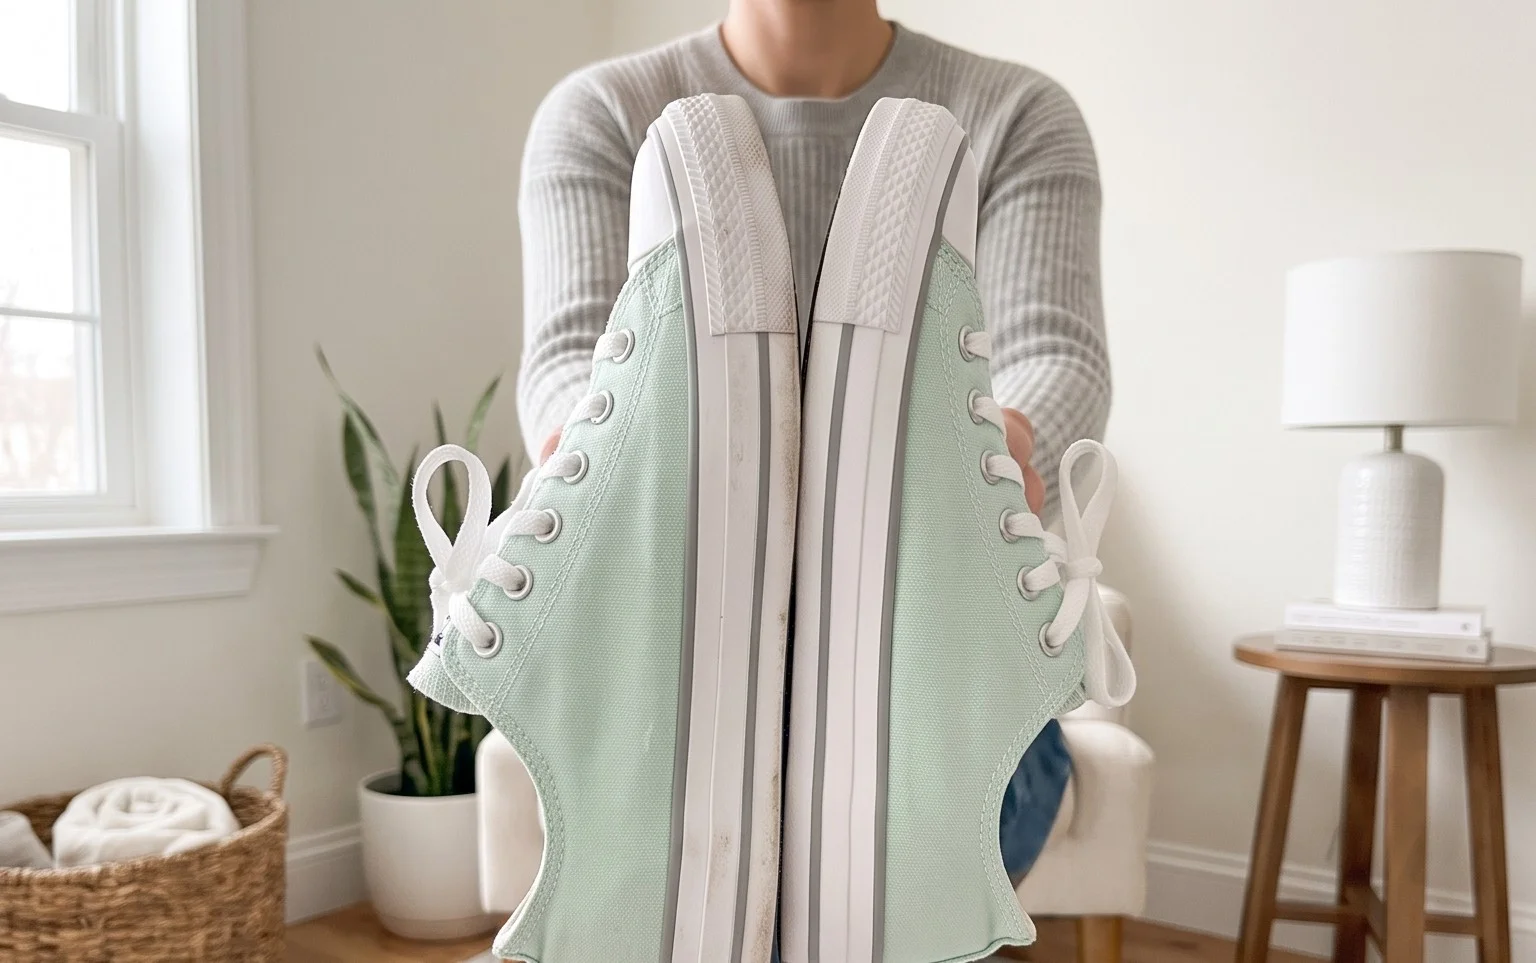
Converse Comeback: How to Clean Your Rubber Soles Like Magic
There’s something undeniably cool about a fresh pair of Converse. That iconic silhouette, the effortless style – they’re a wardrobe staple for a reason. But let’s be honest, those pristine white rubber soles don’t stay pristine for long, do they? Mud, scuffs, dirt from a thousand adventures can quickly turn them from bright white to a disheartening shade of grey. The good news? Getting them back to their former glory isn’t as daunting as you might think. In fact, with a few simple steps and a little bit of elbow grease, you can restore your beloved kicks to their near-original shine. Today, I’m going to walk you through my tried-and-true method for cleaning Converse rubber soles, making them look almost brand new.
Gathering Your Arsenal: What You Need (and What it Costs)
Before we dive into the magic, let’s make sure you have everything you need. The beauty of this method is that it relies on common household items, so you probably already have most of them lurking in a cupboard.
* **Toothbrush (Old or Dedicated):** This is your primary scrubbing tool. An old toothbrush you’re no longer using for your teeth is perfect. If you prefer to keep things separate, a cheap multipack from the drugstore will set you back around $3-$5 for 4-6 brushes. I usually have one designated just for cleaning shoes.
* **Baking Soda:** The gentle abrasive and deodorizing hero. A standard box of baking soda costs roughly $1.50-$3.00 and will last you ages.
* **White Vinegar:** The acidic powerhouse that helps lift stains and grime. A 32-ounce bottle of white distilled vinegar is usually around $2-$4.
* **Mild Dish Soap:** We’re not looking for anything fancy here, just a regular, everyday dish soap. A bottle of this will cost you about $3-$5 and again, will last a long time.
* **Microfiber Cloths (2-3):** These are great for wiping away excess product and drying. You can find packs of 3-5 microfiber cloths for $7-$15 depending on the size and brand.
* **Bowl or Small Container:** For mixing your cleaning solution. Any old bowl or plastic container will do.
* **Water (Tap is Fine):** Free!
* **Optional: Magic Eraser (Melamine Foam Sponge):** For those really stubborn scuffs, a Magic Eraser can be a game-changer. A pack of 2-4 will typically cost around $4-$7.
Roughly, you’re looking at an initial investment of around $15-$30 if you need to buy everything, but most of these items have multiple uses and will last for many cleaning sessions.
Measuring the Mess and Planning Your Attack
Before you grab your toothbrush, take a moment to assess the situation. Are we dealing with a light dusting of everyday grime, or has a recent muddy escapade left its mark?
* **Identify the Problem Areas:** Most of the time, the soles are the main culprits, but check the toe caps and any rubber accents on the uppers. These might need a gentler approach.
* **Assess the Material:** While this guide focuses on the rubber soles, be mindful of the canvas or leather uppers. We want to avoid getting too much of our cleaning solution on these parts, especially if they are a lighter colour or made of suede.
* **Time Commitment:** Honestly, this isn’t a 5-minute job if you want truly magical results. For a pair of moderately dirty Converse, I’d budget about 30-45 minutes. If they’re exceptionally grim, it might take closer to an hour.
The Magic Unveiled: Your Step-by-Step Cleaning Guide
Here’s the foolproof process to bring your Converse soles back to life.
1. **Prep Your Space:** Find a well-ventilated area. I usually do this in my kitchen sink or on a sturdy, easily wipeable surface. Lay down some old newspapers or a towel to protect your surface from drips. Remove the shoelaces – this allows you to get to every nook and cranny of the sole and prevents them from getting stained.
2. **Create Your Cleaning Paste:** In your bowl or container, mix about 2 tablespoons of baking soda with enough water to form a thick paste. It should have the consistency of toothpaste.
3. **Apply the Paste:** Using your toothbrush, apply the baking soda paste generously to the rubber soles. Don’t be shy! Really work it into any grooves or textured areas where dirt likes to hide.
4. **The Vinegar Rinse (Optional but Recommended):** For an extra cleaning boost, lightly dampen your toothbrush with white vinegar. You can either dip the paste-covered toothbrush into a small amount of vinegar or pour a little vinegar directly onto the sole. You’ll notice a slight fizzing action – that’s the baking soda and vinegar working their magic.
5. **Scrub Away!** This is where the magic truly happens. Start scrubbing the soles with firm, circular motions. Focus on any discoloured areas and scuff marks. Be patient; some marks might require a bit more elbow grease than others. For the textured parts of the sole, use the bristles to get right into the lines.
6. **Tackle Stubborn Stains (If Needed):** If you have particularly stubborn black marks or scuffs that the baking soda paste isn’t lifting, this is where your Magic Eraser comes in. Dampen the Magic Eraser slightly and gently rub the affected areas. Be careful not to scrub too aggressively, as it can wear down the rubber over time.
7. **Rinse and Wipe:** Once you’ve scrubbed all the soles to your satisfaction, it’s time to rinse. Use a damp microfiber cloth to wipe away the baking soda paste and loosened dirt. You might need to rinse the cloth a few times. For a more thorough rinse, you can carefully run the soles under a tap of cool water, being sure to avoid getting the uppers too wet.
8. **Clean the Uppers (Gently):** If your canvas or leather uppers have minor scuffs, you can use a separate damp cloth with a tiny drop of mild dish soap. Gently wipe the affected areas, and then immediately wipe with a clean, damp cloth to remove any soap residue. For canvas, you can also use your baking soda paste sparingly and a soft brush, but always test on an inconspicuous area first.
9. **Dry Them Out:** This is crucial! Use a dry microfiber cloth to thoroughly dry the rubber soles and any parts of the uppers you cleaned. You can then leave your Converse to air dry completely in a well-ventilated spot, away from direct heat or sunlight, which can damage the materials. Stuffing them with newspaper or paper towels can help absorb excess moisture and maintain their shape.
Styling Notes for a Tidy and Chic Space
While this article is about cleaning your shoes, the principles of organization and mindful placement can elevate your entire living space. When it comes to your freshly cleaned Converse, or any other footwear for that matter, think about where you store them and how you integrate them into your home’s aesthetic.
* **Colour Cohesion:** Your clean, white Converse are a blank canvas. They’ll look fantastic against darker, richer flooring like dark wood or deep-pile rugs. If your space is already very light, consider a subtle pop of colour in your rug or a nearby decorative item to draw the eye.
* **Texture Play:** The canvas of Converse offers a casual, textured feel. Complement this with other textures in your home: a chunky knit throw blanket on a nearby sofa, a woven storage basket, or even a potted plant with interesting leaf texture. This creates visual interest without being overwhelming.
* **Strategic Placement:** Don’t just shove them in a corner. If you have a designated entryway, consider a stylish shoe rack that can hold your clean kicks. Look for racks made of natural materials like wood or metal for a modern, minimalist look, or something more industrial if that’s your style. If you’re in a rental and can’t drill, consider freestanding tiered shoe racks (these can be found for $20-$50) or even attractive open shelving units. For a very small space, a slim, vertical shoe organizer that hangs over a door (around $15-$25) can be a lifesaver.
* **What to Put Where:** Think about how you use your entryway. Keep a small tray for keys and mail near your shoe storage. If you have a bench, a decorative cushion or a small plant on one end can make the space feel more intentional. For your Converse, make sure they are clean and laces are tied neatly – it makes a huge difference to the overall look.
Keeping the Sparkle: Tidy After Week One
The magic of clean Converse can fade quickly if you don’t maintain them. Here’s how to keep that fresh feeling going:
* **Immediate Wipe-Down:** After each wear, give the rubber soles a quick wipe with a damp cloth. This will catch any light dirt or scuffs before they set in. This takes literally 30 seconds.
* **Spot Cleaning:** If you notice a specific mark after a week, don’t wait for a full deep clean. Grab your baking soda paste and toothbrush and tackle that one spot.
* **Proper Storage:** Don’t leave them in a pile on the floor. Store them on your shoe rack or in their designated spot. This prevents them from getting scuffed by other items and keeps your space looking neat.
* **Regular Lacing:** Ensure your shoelaces are clean and tied neatly. It’s amazing how much of a difference this makes to the overall appearance of your shoes.
The Pitfalls: Mistakes That Make This Magic Fail
Even with the best intentions, a few common mistakes can derail your cleaning efforts.
* **Using Harsh Chemicals:** Bleach or abrasive cleaners can damage the rubber and the fabric of your Converse, leading to discolouration or weakening of the material. Stick to the gentle, natural methods I’ve outlined.
* **Over-Soaking the Uppers:** While the soles are rubber, the canvas or leather uppers are not designed to be completely submerged in water. Too much water can lead to water stains or damage to the material. Be precise with your cleaning.
* **Skipping the Drying Step:** Letting your Converse air dry haphazardly can lead to mildew or that unpleasant damp shoe smell. Ensure they are thoroughly dry before storing them or wearing them again.
* **Using the Wrong Brush:** A wire brush might seem like a good idea for tough dirt, but it will scratch and damage the rubber. Always opt for a soft-bristled toothbrush or a gentle scrub brush.
* **Not Addressing Stubborn Stains:** Forgetting about those really tough scuff marks can mean they become permanent. Don’t be afraid to use a Magic Eraser sparingly on these specific areas.
Cleaning your Converse rubber soles is a rewarding process that can breathe new life into your favorite footwear. With a little care and the right approach, you can keep them looking their best, ready for whatever adventures come your way. Happy cleaning!
Conclusion
There’s a simple magic in a fresh pair of clean Converse, isn’t there? It’s not just about appearances; it’s about how that little detail can brighten your whole day, making you feel put-together and ready for anything. To start experiencing this easy transformation, grab a damp cloth and give those rubber soles a quick wipe-down right now. It’s the smallest step that makes the biggest difference!
For other spaces, consider a decorative basket for your entryway to keep shoes tidy, or a simple DIY spray bottle with water and a drop of dish soap for quick touch-ups on any household surfaces. We hope these ideas inspire you to bring a little more sparkle and order into your home.
Explore More Ideas
Ready for more tips to make your home feel fantastic? Dive into our other articles for endless inspiration!
